Verifying Google Analytics & Webmaster Tools after HTTPS SSL Upgrade
 Something that has become super popular among web developers, marketers and website owners is upgrading websites with an SSL certificate. The SSL (Secure Sockets Layer) verifies with Google that a certificate has been purchased for the domain and supposedly helps with SEO ranking. You can tell a site is “secure” with a little padlock icon in the browser address bar to the left of the URL address.
If your site does not have an SSL certificate attached you might see a “Not Secure” message. This kind of sucks for the many websites that don’t do any transactions with customers: taking comments, credit card payments, etc.; but for websites that do store user data is it imperative to purchase SSL.
Here’s how to get your website updated for SSL after purchasing SSL for a domain.
SSL update on Google Analytics
This part is easy. Once SSL is purchased all you have to do is go into the property on Google Analytics > Admin > Property Settings > Default URL – and click on the popup menu to change http:// to https://. That’s it! Be sure to click Save at the bottom of the page.
SSL Update on Google Webmaster Tools
Unfortunately, on Google Webmaster Tools (now called Search Console) any different URL address is considered a different property. You need to click on the left column, top section down arrow, slide down to the bottom and click Add Property. From there, add your new https:// address. example: https://mydomain.com.
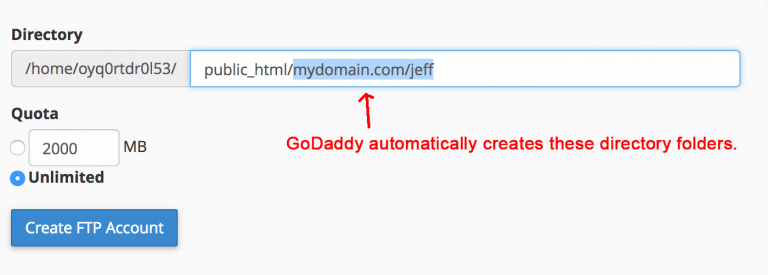
Then, you need to verify the domain. One easy way to do it is by simply verifying using Google Analytics. However, if your verification code is not found (sometimes with CMS sites the code may be added in a different location) you will need to download a verification file and upload it to the main “root” folder of the public domain.
For those of you who are Webmaster Veterans this sounds familiar. However, we’ve found one issue to look out for. Since a verification file may already exist, when you are uploading you may consider not replacing because it is already there. However, after trying to verify the website twice and getting “failed” messages we realized the content of the Google verification file may have been slightly different.
The content of the .html file may look something like this: google-site-verification: google12345abcd6789ef.html
The solution? Simply overwrite the old verification file. The name of the file is the same, so there should be no problem with having it verified after replacing.