How To Add Custom Fonts To Your HTML Website
How do you add a custom font on your website? It’s easy! Websites and apps rely on fonts for branding and user experience. A custom font can add that appeal that sets your design above others. We’re way beyond the days of Arial and Times New Roman used in the early the internet. Now, you can find a font that fits your style and brand.
Here is a method using free Google Fonts. This methods can apply to most cloud-based font archives.
Instructions
Install the code yourself within the <head> </head> tags and style.css files.
This assumes you know how to edit your website files using a Text Editor (such as Sublime, BBedit, or simple text program) and uploading/downloading those files via FTP, File Manager (in cPanel) or Terminal (Mac) or Command Prompt (Windows). You can add the code needed to install fonts using the <link> tag and css. (NOTE: Always make a backup first of any files you are modifying!)
Go to fonts.google.com
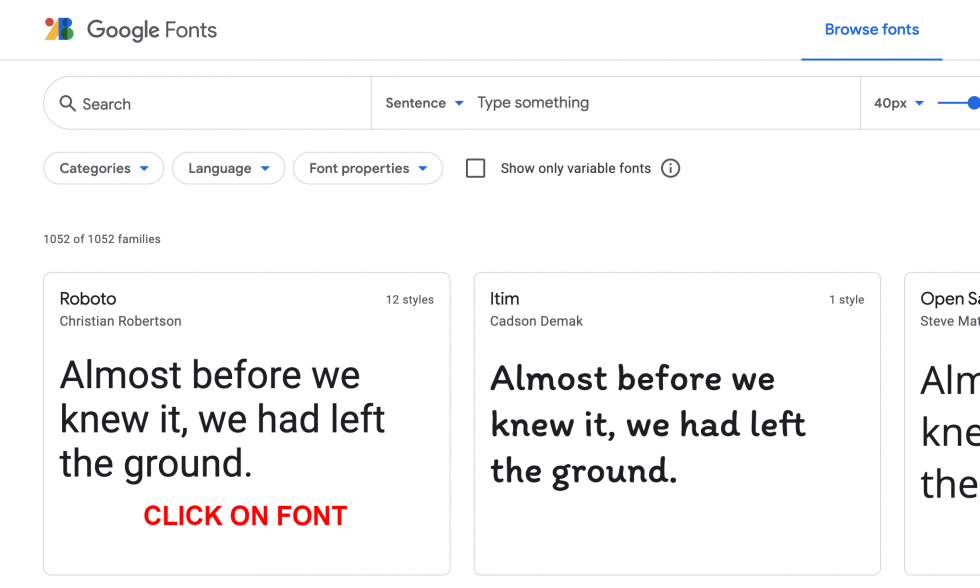
Choose a font you like:
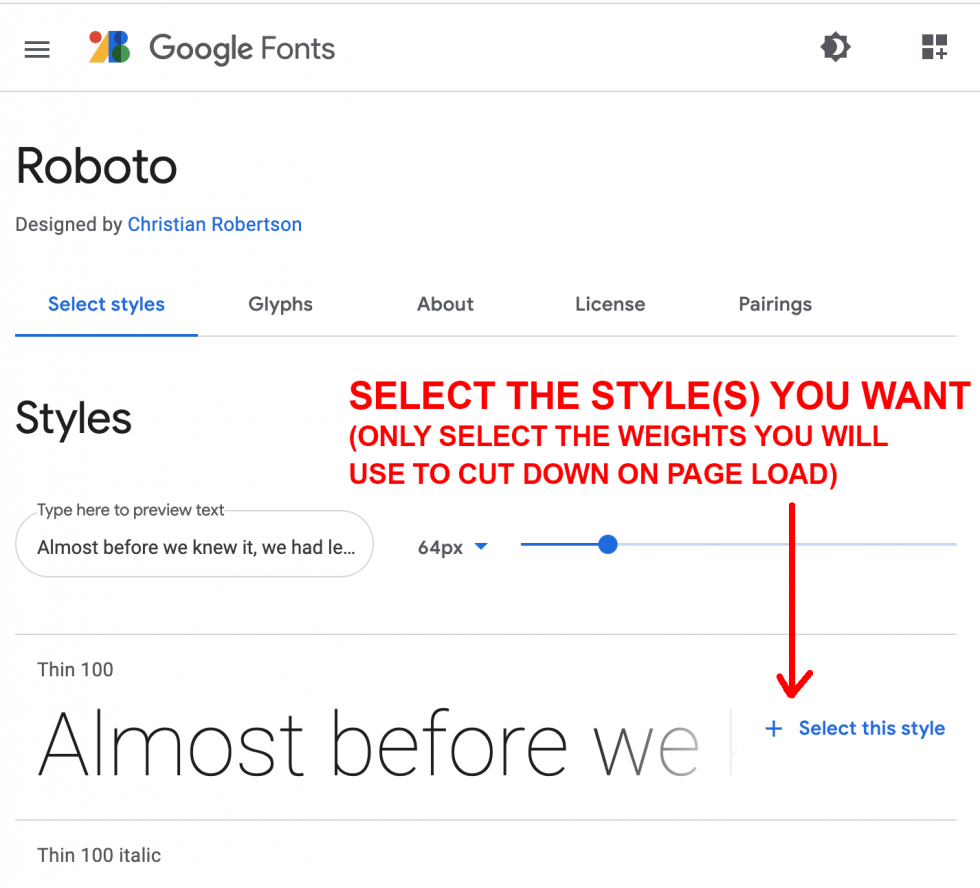
Pick the weights (only the weights you will use)
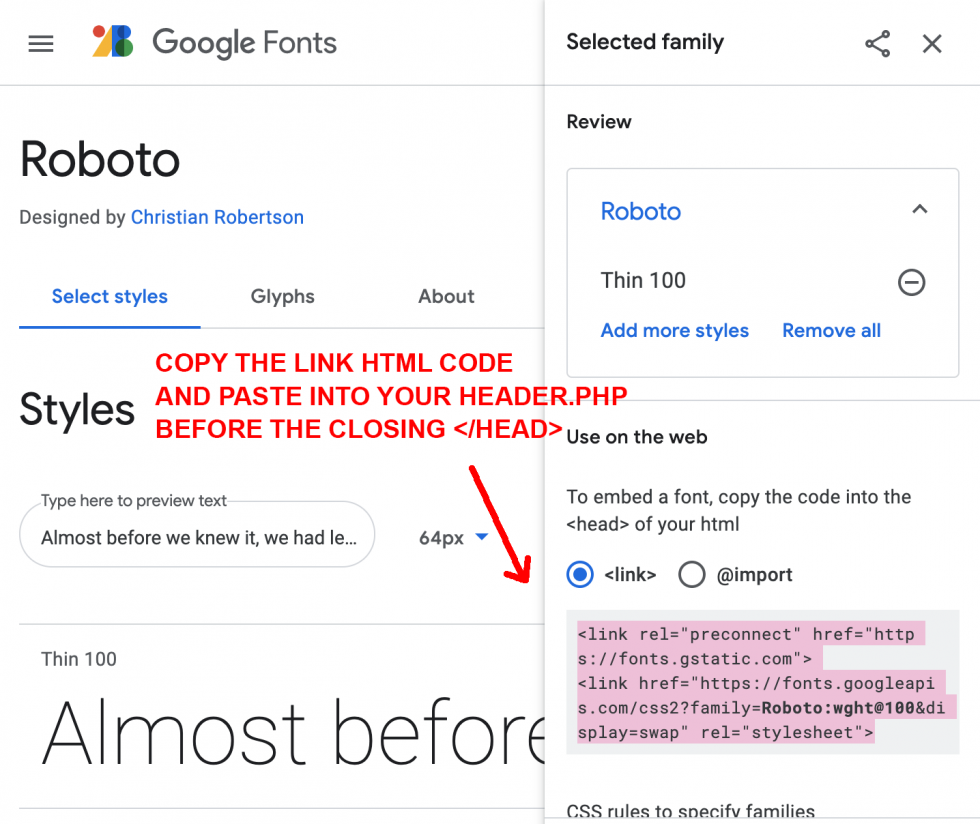
Copy the link code. This will go in the <head> </head> section of your HTML page or head.php file. You could place it near any other link code. This code pulls the font files from the Google Font server and into your website pages. We use it in the <head> tag because that section will be included in every compiled HTML page.
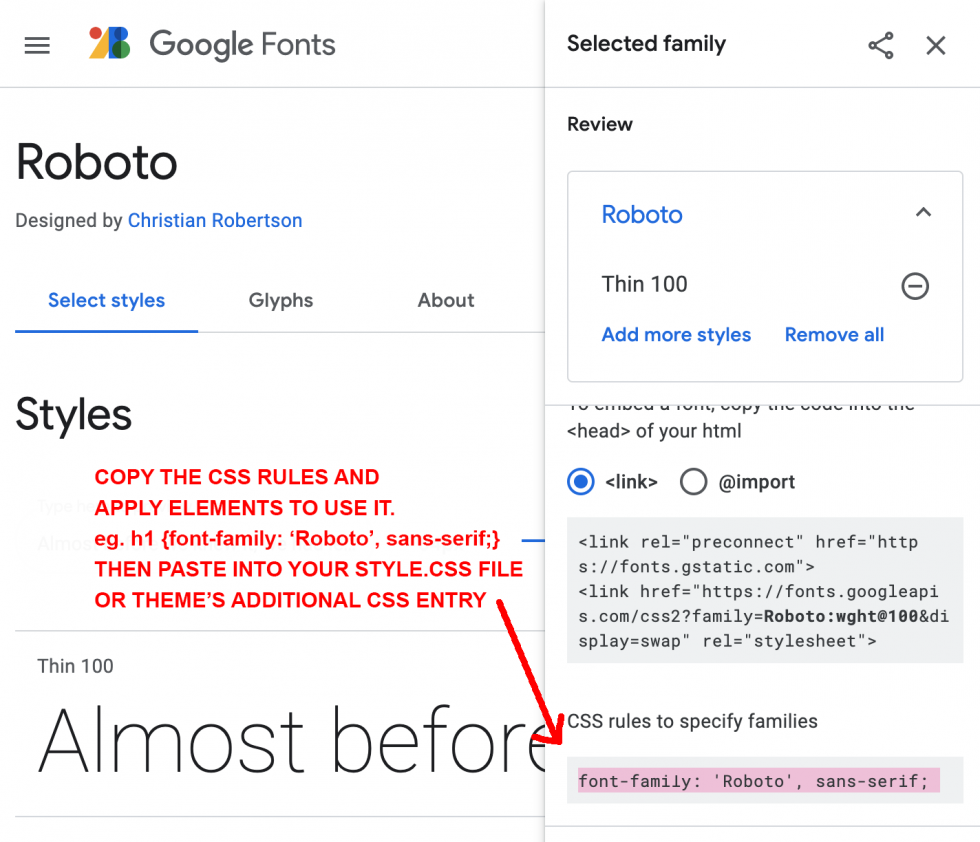
Copy the css code. This will go into your style.css file. This is where you apply the font to your elements such as p, h1, blockquote, classes, or ids.
Be sure to test an element on your page using the same selectors you styled. For example, in the css above the h1 is styled with Roboto.