WordPress: How To Add a Slideshow from a Gallery
Here is how to use a Gallery in WordPress and have the image thumbnails enlarge to full view when clicked on. First, we’re assuming you know how to create a Gallery in WordPress. If not, simply search in the Block inserter for “gallery” or “image,” then click to insert a new Gallery. Then, Upload images or choose existing images from the Media Library.
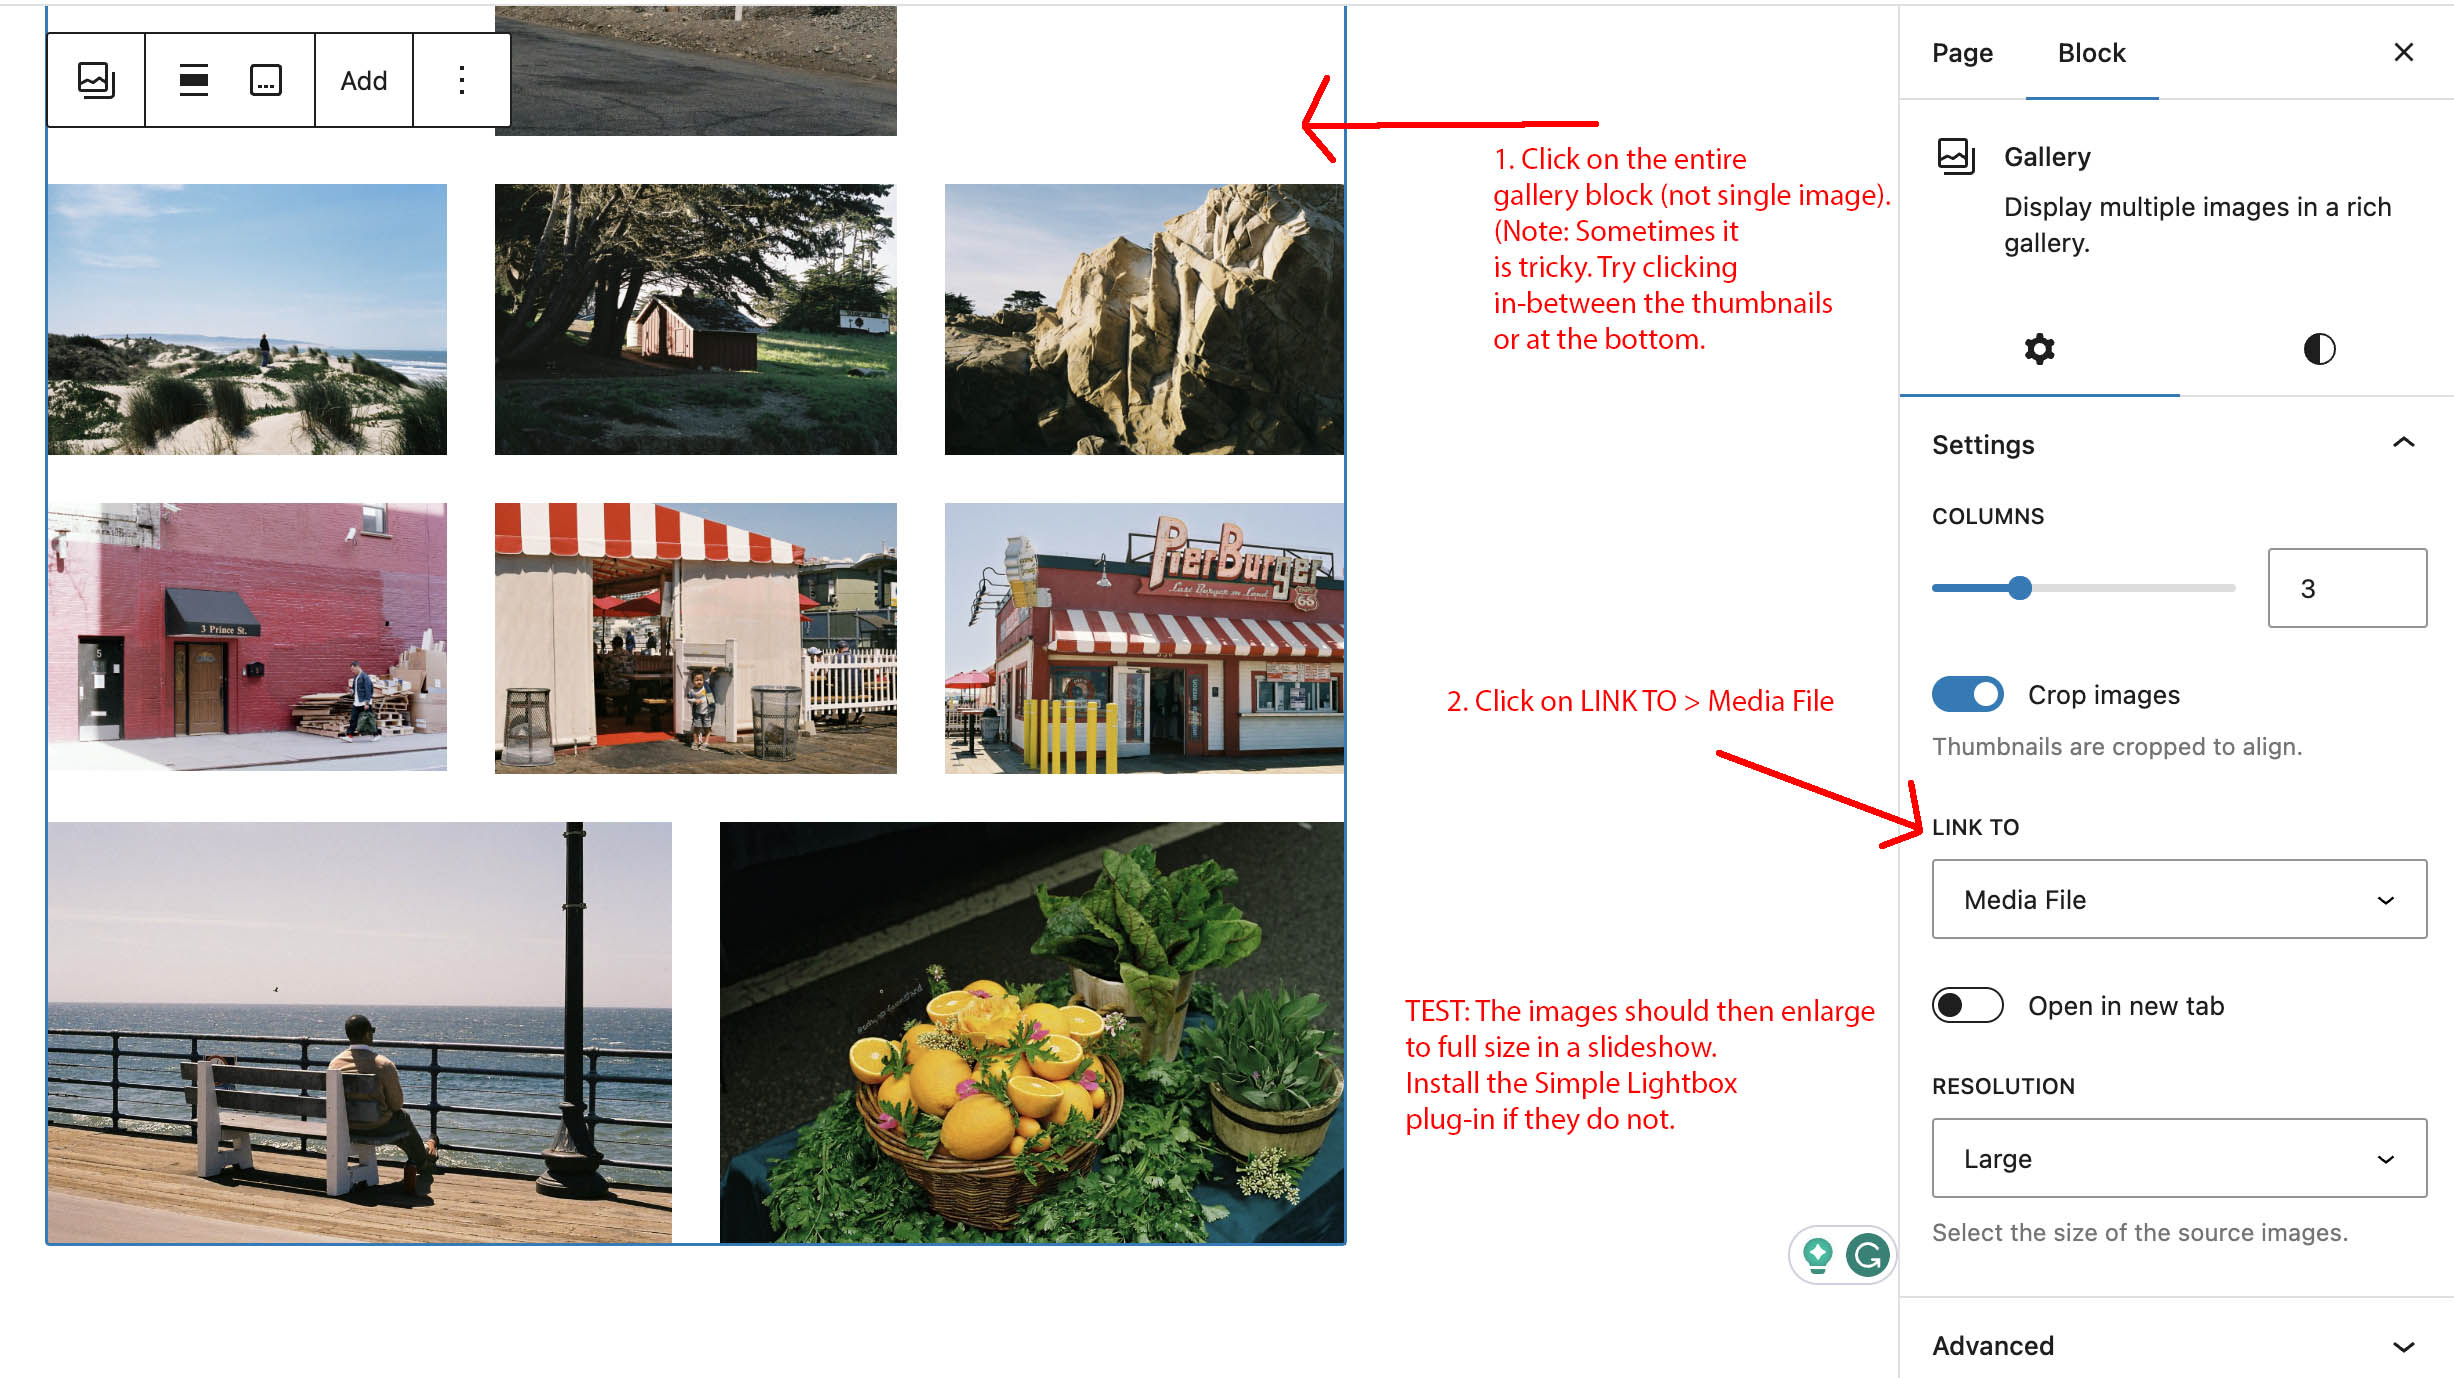
After you have selected some images click Create a new gallery, then Insert Gallery. Once the Gallery is in your WordPress Page or Post go the Gallery settings in the Block settings in the right column. [Note: sometimes the Gallery is hard to select. Be sure the entire Gallery is surrounded by a blue line, otherwise you may have just selected an image. You can also use the List View to select the Gallery. See the reference screenshot above.]
When the Gallery is selected, find the block settings in the right column and look for LINK TO and select Media File. You can also select the image in the gallery and click on the link icon. This reveals options for Media File, URL, and Attachment Page. Click on Media File. You might need the Simple Lightbox plug-in or other slideshow plug-in installed. We’ve found selecting the Gallery first, then enabling Lightbox before setting the image links seems to do the trick.

Pro Tip: Make sure the images are not straight out of your camera or smartphone. Generally, we do not suggest uploading images that exceed 2000 pixels or 500KB (unless the images are intended to be high resolution for printing). You will need Photoshop or another application to downsize the images.